Showing posts with label card. Show all posts

Sunday, June 16, 2013

Happy Father's Day (3D die cut card)

My dad wears a ratty, tattered vest and even though I've given him new ones, he still keeps wearing the old one anyway. He doesn't wear a bow tie, but I think he'll get a kick out of this card anyway.


I've been experimenting in the realm of "printables" and this is made of 3 pieces - the bow tie, shirt, and vest, cut from 1 sheet of letter-size paper on 80lb cover stock. It was fun to shade the bow tie and give it a sense of 3D while really giving a 3D shape. Details in the buttons and stitching was a cinch to print. It helps keep the vest flaps down when the card is closed. I've written my message under the shirt, which is removable.


Somehow I quite like the back as well simply for its minimalism. He's a man of little words, so I'll see what kind of reaction I get during tonight's dinner.


If you'd like to cut this card by hand, I'm selling a "printable" and "cuttable" file on Craftsy.


Wednesday, May 8, 2013

Happy Mother's Day Card (die cut tea cup)


My mom has kept and treasured the handmade cards I crafted for her as a child. There's no better #1 fan than the person who has reassured my fears and advised me to do what made me happy.

I tend to be very structured in my designs, even though I have always admired more free flowing pieces. So I'm trying to push beyond my comfort zones and this is my first experiment.


I sketched my ideas, imagining how the layers of colors will come together. Stardream and Daiso paper is wonderful to cut even with a dullish blade and somewhat fine lines, because there aren't any residual fibers of paper sticking out in tight corners.


It's amazing how an idea can end up being so much more labor intensive than I imagined. The finer lines makes a smaller area for gluing, so the flowers simply take more time to secure. The graphic designer in me wants to simply print the color, even though I enjoy the look of layered paper. However, I can't dispute how well it looks overall when it matches the teacup perfectly.


I'm still working out the kinks on my 3D teacup, but I like how it comes off the page. I wanted to make the "tea" shiny and wet looking so thought of using some glitter nail polish.

Saturday, April 27, 2013

3D Coffee Cake Birthday Card


This was a par-boiled idea, but I was making espresso the other day and realized the grounds are quite fine, so of course I thought of flocking. I have a birthday for a guy coming up and he loves coffee (it's not as easy for me to make cards for guys for some reason). I thought of making a coffee cake and covering my cake with grounds, then topping it with real whole coffee beans.


I tried using double sided tape, but the grounds (unused) wouldn't stay on. The glue holds an amazingly thick layer of grounds when I did a test. So I put down light blue vinyl on the cake where I didn't want coffee. Unfortunately the glue stayed on the vinyl too. So I had to apply the glue carefully before dousing with grounds. It's a good thing I used brown paper so any bare patches blend in.

Now that it's done, it makes me think of a chocolate mocha cake – plus it's like scratch and sniff sticker, except no scratching is needed!


Wednesday, April 24, 2013

Wedding Cake Card by Kelly


I'm not a bling personality, but I have to say this wedding cake card by Kelly, (findingtimetocreate.blogspot.ca) got my attention. It says everything a bride wants their special day to say, an event to remember for all time.

Although the background is neutral and allows the flowers to take center stage, the glitter makes a splashy show all on its own.


Kelly explains in great detail how she made this 3D cake card with glitter and what materials she had to change up to make it work. I love how she explains things so thoroughly, like all her posts on her blog.

Thanks, Kelly, for generously allowing me to show your card on my blog!

Cecelia

Thursday, April 18, 2013

DIY Flocking


I've been seeing flocking all over the stores (and some ingeniously decorated nails). It's kind of like colored, fluffy, cotton candy, but in teeny pieces. I didn't want to buy more things, so my first thought was can I make my own? Yes I can!

I borrowed the microfine shredder from the kitchen, wadded up some paper scraps from Daiso, and shredded away. In case I didn't cover everything, I used the same color yellow as a backing, covered it in glue and dipped into my paper flocking (tweezers are helpful!). Then I glued it to my daisy flower, which then decorated my 3D cakes.


Wednesday, April 17, 2013

3D Cake - Daisy Birthday Card


Ever get those birthday cakes topped with plastic signage? I kind of wanted to replicate that for this birthday girl's card. I stacked the words 4 times out of card stock to make my own chipboard, just like I did for the LOVE sculpture. This time I made the top layer out of a lighter green so when it's viewed from the side, it gives another dimension - just a little something different. I stuck foam squares near the top so they stick up, then glued the bottom part behind the daisies.


Her fave color is yellow and since my original cake was too short to let me go nuts on the decorating,  I made it twice as tall. I always place my elements on my card to assess the spacing before gluing permanently. Although I thought everything was well placed, it ended up being lower than I intended when I stood back. So I added the fireworks I used on my Mickey Mouse project to fill the top. I feel like I overdid that too, but ah well, I'll live.

PS, here's a teaser image for my next post, where I'll explain how I made the stamens in the middle - yes, it's paper!


Thursday, April 11, 2013

Shaping Die Punch Flowers


Before buying my Silhouette SD digital die cutter, I bought die punches like these. I toyed with giving them away, but now I'm really happy I didn't.


I shudder to waste paper scraps and want to use every inch of it before tossing it out (see my post on How to Use up Scrap paper). Using these die punches was easier and faster than trying to register the exact placement needed on my Silhouette. However, I still used the Silhouette to cut my cherry blossoms (middle punch) because I wanted the cup the petals more readily.


Top left: If using a cherry blossom die punch, snip in between the petals to make them easier for cupping.

Top right: This blossom is cut from my die cutter - see the deeper gaps between petals? I used a burnisher and rubbed the petals against a mouse pad. For those who have a digital die cutter, here is the cherry blossom I made in SVG, DXF and PDF format.

Bottom left: Continue rubbing into the center to make a small bud.

Bottom right: If you want the blossom to stay open, flip it over and poke a smaller burnisher into the middle, then add dots with a felt marker to represent the stamens.

I then used them to decorate this 3D cake card.


3D Cake Card with Punched Flowers


My sister in law is always well-dressed, so put together. She is feminine without being girly. I  wanted to give her a 3D birthday cake card that expressed that (I hadn't chosen my greeting yet when I took this photo).


I had so much fun making these flowers after being inspired by Michelle's version. After stepping back I worried I had gone too far and overdid it, but I think I'm just not used to so much adornment, being a tomboy at heart.


I cut some 1/8" quilling strips in half which made them more pliable as I decorated the cake. This let me strew blossoms in a more random way. I used a white felt marker to dot some stamens in the middle of the blossoms.


I dipped the blossoms into Aleene's Tacky Glue and they held fast when applied to the cake. I didn't have to sit there and wait around. I'll be showing how I shaped the blossoms in a following post soon.

Wednesday, April 10, 2013

3D Cake Card by Stephanie Elliott


This is a card made by Stephanie Elliott, who customized my 3D Cake Collection. I love how she customized it with dripping icing and then topped it off with glistening glitter. Here's how she did it:

I love microfine glitter so I layered cardstock with double sided adhesive, stacked the icing designs on the cake, and sent it through the cutter twice – once to cut the design from the adhesive liner, the second time to actually cut the parts from the card stock. The design cut beautifully and, after coloring the icing & cake parts with glitter, assembly was easy (with your great instructions). I used the double sided adhesive only because I wanted to color by selection with glitter. Using that adhesive, though, proved to be incredibly useful in assembly. I completed one card and constructed the box (which is great, by the way). I love how everything turned out.

I cut all of the parts for the first card on a Black Cat Cougar. I cut all of the parts for this last card on a Cameo (can’t let either cutter feel left out). This card is a top fold card with accordion pockets on the inside. There are note cards in each pocket. Again, thank you so much for designing such a wonderful set. I’m already thinking of a dozen events for which your design will be perfect.


OK, so I admit to being just a tad OCD and the way Stephanie has opened up those pockets to show the accordion file holding note cards makes me itch to make something just as organized. However if I were the recipient of this wonderfully coordinated card, I couldn't bear to use them!

When I asked her about the differences between cutting machines she's used, Stephanie went into great detail, describing their fine points and sharing her knowledge. She has been tempted to start a blog to share tutorials and files, but I think she's busy creating gifts to be cherished. She very kindly let me show her work here, and I hope you'll leave a comment for her to read - and hopefully she'll start her blog to share more of her projects! Thank you, Stephanie!

Wednesday, March 27, 2013

3D Cake by Michelle and Kelly


I simply love seeing my designs come to life in another person's hands. It's wonderful to see the same cut file used in different colors and texture than I imagined.

The first card is made by Michelle of Michelle My Belle Creations. It seems so obvious now that the flowers she used was such an ideal choice. I also like the bling she added using sequins in the upper parts of the swoosh.

The second card is by Krafting Kelly of Finding Time to Create. Ah, these are the times I wish I had a ready supply of scrapbook paper in my shelf. I love how she placed the initial right on top of the cake - like one of those special candles. Again - why didn't I think of that?

Thank you for playing with my files, Michelle and Kelly!

Tuesday, March 19, 2013

3D Cake Collection

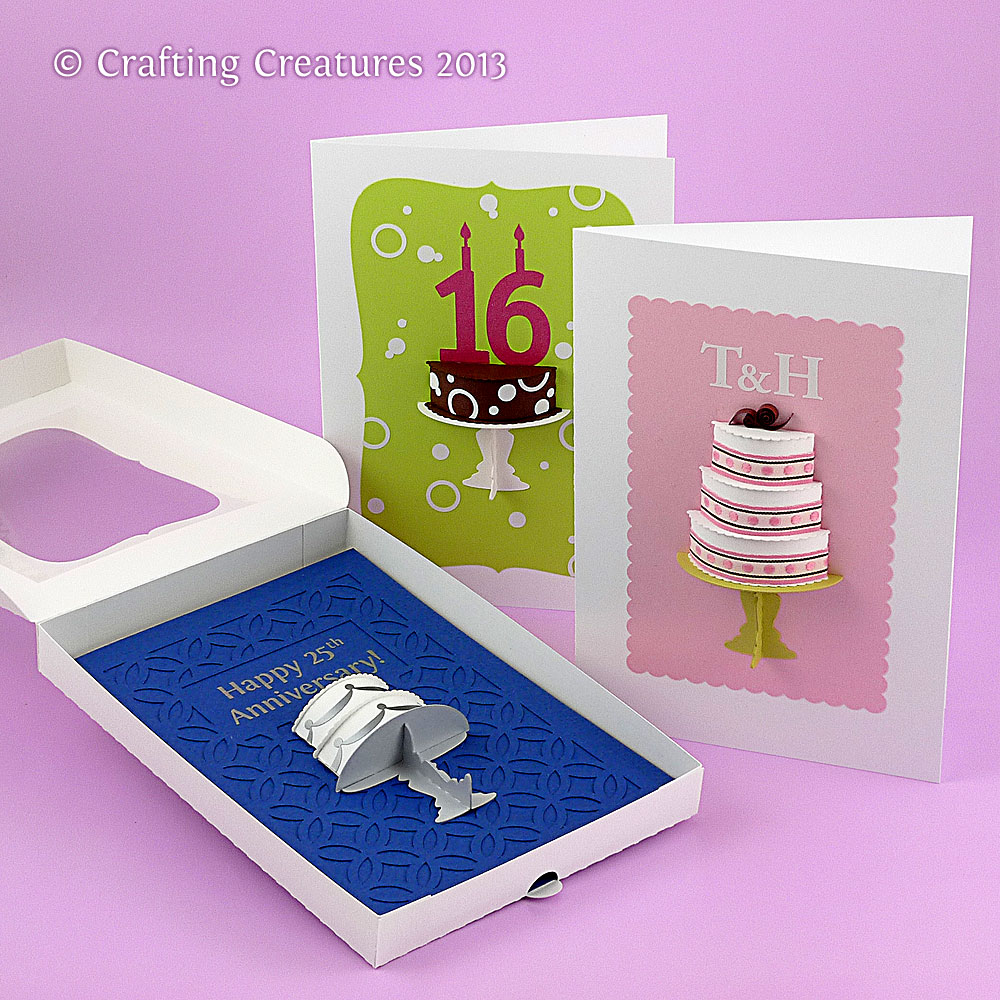
I'm quite excited to offer these 3D paper cakes, easily customizable for a birthday, wedding, or anniversary in my store.


Here's an example of a single layer chocolate cake with white circles icing (I used white vinyl). I've seen many examples of polka dotted icing on cakes, and thought it would great to have a matching background.


Add a second layer of cake on top and some swooshes to make a classic celebratory statement. I designed a subtle backdrop pattern made of diamonds and left a blank plaque above for whatever occasion you need. 

My favorite has to be the 3-tier cake. Somehow the more tiers it has, the more fun it is. I decorated it with ribbon and matched the background using a scalloped edge. The chocolate shavings on top were made of quilling paper, but you can just as easily use any brown paper with 1/8" width.
What cake would be complete without a cake box? I used some scrap plastic left over from some packaging and glued it with Scotch Quick Dry glue. I also added some easy-open tabs so you won't have to struggle prying open a well-fitted box. All the cards are 5x7 inches.
Michelle of MichelleMyBelle Creations made an awesome purple cake with flowers, sequins, and textured backgrounds. I like how she added a bow to the stand which makes it more dimensional.

Please let me know what you think in the comments section!

Friday, February 8, 2013

Quilled Thank You Cards (8 of 8)


Yet another variation of the first card, just a different mix of colors and layout. Thanks to all who have been tracking this set of 8 cards.

The blank greeting card stock I'm using is Neenah Classic Linen Cover, Solar White, 80 lb. It's A6 size (4 5/8" x 6 1/4"). Can you believe I scored a box of 250 for just $5 from Spicers Cash & Carry? They were being discontinued, so of course I bought all 5 boxes for easy Christmas gifts. I love how the embossed rectangle subtly frames everything.

I'd like to thank my client, "C", who kept me in her back pocket for a whole year, waiting for this project to come along to contact me. It's been a dream come true! I am allowed to reveal it tomorrow, and if you live in Vancouver or Toronto, you'll can see it in the Ming Po or Sing Tao Chinese newspapers too.

Thursday, February 7, 2013

Quilled Thank You Cards (7 of 8)


I was running out of left over bits, so this one was a bit of a struggle. Not my fave, but it still runs along the same vein as the rest.

It's an amazing time we live in when I can "show and tell" online and within seconds, my thoughts are read halfway around the world. Without the web and its crafting community, I wouldn't have had the exposure I've had. I'm thankful for the opportunities that have been handed to me on a silver platter.

Wednesday, February 6, 2013

Quilled Thank You Cards (6 of 8)

I never realized how fun it would be to do abstract quilling until I had to use up my leftover pieces. It's amazing to me how little can still say so much. Since these were made with thicker strips I didn't want to mix it up with my regular pile of quilling pieces in progress, which I keep in a fishing tackle box - just $6 at Canadian Tire and comes with re-positionable compartment walls.

My thanks this time goes out to all of you who comment on and follow this blog. Your positive words encourage me to work through my doubts and give me a pick-me-up. I appreciate your visits and the time you take to let me know your thoughts. Thank you all!

Sunday, February 3, 2013

Quilled Thank You Cards (5 of 8)


Another variation of Card 1 and 3, but with a softer color palette and smaller scale of petals.

These quilling strips were cut on my Silhouette die cutter out of Canson Mi-Tientes. I chose this paper because the thicker qualities allowed me to carry the curves over a longer distance with more control. I find standard quilling paper to be rather thin, more suited to smaller designs. I learned cutting with/against the grain had an impact on the innermost coil, causing either buckling vs a smooth tight line. I suggest cutting one strip and testing it first before cutting the entire sheet.

A quick thank you to hubby for wrapping all the xmas gifts this year, leaving me free to focus on finishing my project on time. It's not his forté, but he took it on without hesitation.

Wednesday, January 30, 2013

Quilled Thank You Cards (4 of 8)


These two particular shades of orange and green remind me of cantaloupe and honeydew - they just go together.


The project I'll be showing soon had to be completed during the holidays, from the moment I got off work on Dec 21st and due on the 27th. Usually hubby and I would do our holiday baking together in choreographed synchronicity in our compact kitchen - this time he did almost all of it himself and with a huge variety as well. Although it was nice not to be covered in flour, I'm looking forward to next year's bake-fest when we can just orbit each other again. Thanks honey, for taking this huge task off my "plate".

Wednesday, January 23, 2013

Quilled Thank You Cards (2 of 8)


Here’s my 2nd thank you card made from leftover quilled items from the project-yet-to-be-named. Ever feel that zipped mouth feeling playing Taboo when you can’t say the actual words?

I’d like to thank my hubby for driving me to 3 different store chains, 4 separate nights, to pick up 23 shades/sizes of paper for this 1 project…and for listening to countless hours of debates on color usage, composition, drawing style and my self doubts of ability to do this in general.

A sneak peak can be seen in today’s SingTao & MingPao in Vancouver and Toronto. They’re Chinese newspapers, so that should give you a hint which direction I’m going in!

Sunday, January 20, 2013

Quilled Thank You Cards (1 of 8)


I hope everyone’s new year has had an auspicious start. I’ve been sitting on some wonderful news since mid-December that I’m still not allowed to share for yet another month. So until then I’m just going to leak out a few items so I don’t burst. These are quilled items I couldn’t use in the final design, so made them into Thank You cards. I’ll be posting more in the month to come, until I can finally reveal the full design.

I’d like to thank my hubby for letting me peruse the aisles of Daiso, an Asian version of a dollar store, for an hour and a half. His patience has no bounds – even though I test those bounds often. Anyway, here’s a little gem I found that was perfect for my cards to make a floating message. Pre-cut foam squares (336 small and 84 large) for just $2.

Wednesday, November 21, 2012

Paper Poinsettia and Wreath


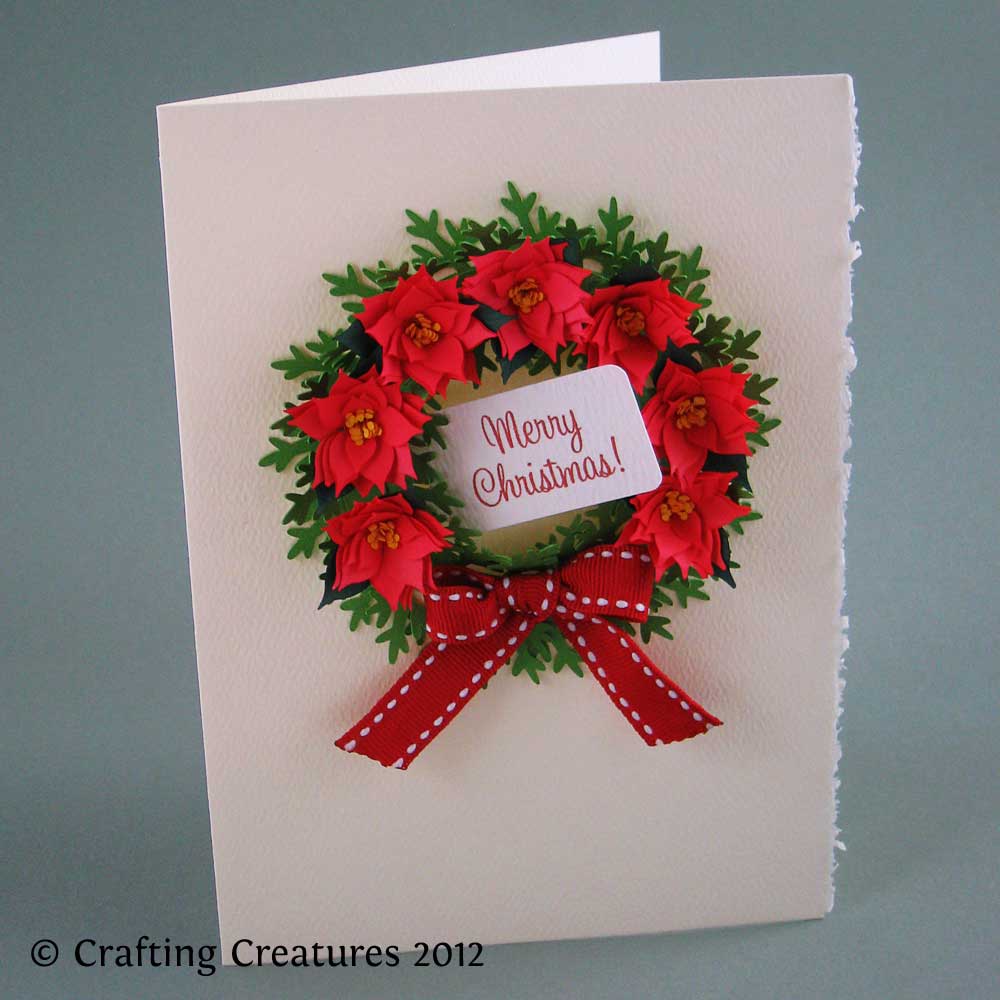
Poinsettias simply say Christmas! The feedback I received for my fringed flowers was so overwhelming, I just had to make a Poinsettia version for Christmas cards.


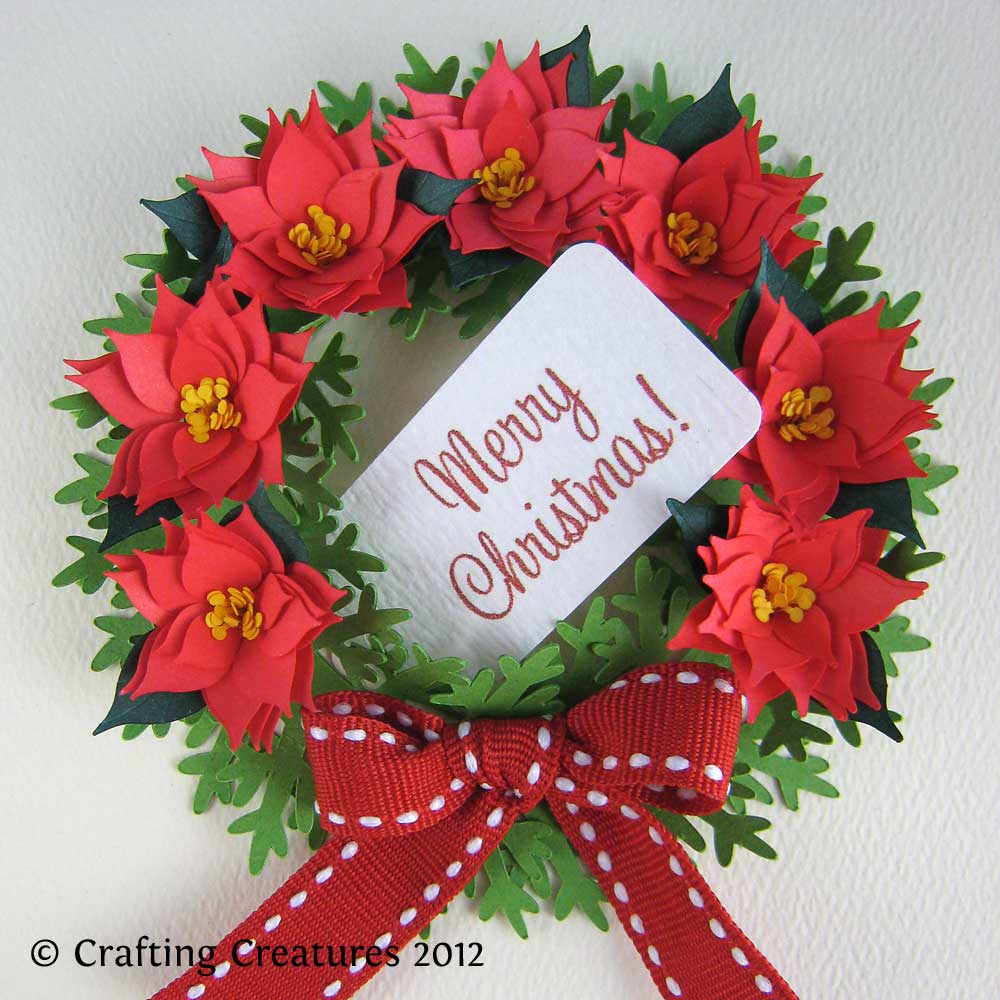
These paper blossoms are designed as a fringed flower to be quilled into shape. The stamen, petals, and leaves are designed as one strip of paper to allow for quick rolling / quilling. Color markers were used on white 28 lb paper in these examples, however they can be cut from colored paper and the three parts glued into one strip.

The pine needle wreath is cut from two pieces of 80 lb paper and overlapped, then fluffed into shape to give the poinsettias a festive base. This example is a 5" x 7" card.


A regular envelope wouldn't do, so I made a windowed box to protect the blossoms.

Maybe I was a squirrel in a previous life, but as a little girl I loved boxes to hold things, keep secrets in them, and to give gifts in. This cube has a prepared hole for an enlarged version of the poinsettia. The cube is 2.5" x 2.5" x 2.5".


I don't bake a lot of cupcakes so this is about as close as I'd come to cupcake toppers. I have loved ones who are allergic to nuts and some who can't handle spicy foods. Instead of a quilling tool, I rolled the poinsettia in a toothpick, then glued in place. Added the warning flag at the bottom, and voila - food markers.


If you'd like to cut and quill paper poinsettias this Christmas, this Poinsettia Collection can be downloaded immediately via my store. I'd love to see what you make with my files, so drop me a line!