Showing posts with label DIY. Show all posts

Thursday, April 18, 2013

DIY Flocking


I've been seeing flocking all over the stores (and some ingeniously decorated nails). It's kind of like colored, fluffy, cotton candy, but in teeny pieces. I didn't want to buy more things, so my first thought was can I make my own? Yes I can!

I borrowed the microfine shredder from the kitchen, wadded up some paper scraps from Daiso, and shredded away. In case I didn't cover everything, I used the same color yellow as a backing, covered it in glue and dipped into my paper flocking (tweezers are helpful!). Then I glued it to my daisy flower, which then decorated my 3D cakes.


Sunday, April 7, 2013

DIY Re-usable Gift Box using Vinyl and Free Flowers


"Just buy a dollar store bag and save yourself time", hubby said. But what's the fun in that? OK, so I was kind of rushed, but it's a different kind of rush right?


I salvaged a stationery box from work that fit my gifts perfectly, but of course it's ugly. I amassed the largest pieces of scrap vinyl (salvaged from a sign store) that would go together.


I made sure the vinyl would cover the box with some excess on all sides, removed the wax, and placed the box right in the middle, using a bone folder to squish out the bubbles from the middle to the outside edges. Then I cut 45˚ slits toward the corners.


I brought the long flaps up, stuck it against the box and trimmed off the excess triangles, leaving a tab to fold over to the other side. This ensures you'll never see the old box.


Then I adhered the short sides and trimmed off the excess all around.

My family and friends know I try to be as eco-minded as possible. I've had to ask for my xmas gift bags back and cushion their crestfallen faces by reassuring them another gift will come in the same bag next year. I don't tend to do that with birthday gifts, so when my sis-in-law saw this box, the first thing she said was "Can I keeeep it?" and hugged it to her chest. I can't tell you how happy that made me!

I've used this free flowers file for other projects in the past like cards and flower pots:
http://www.fordesigner.com/maps//10878-0.htm

Wednesday, November 21, 2012

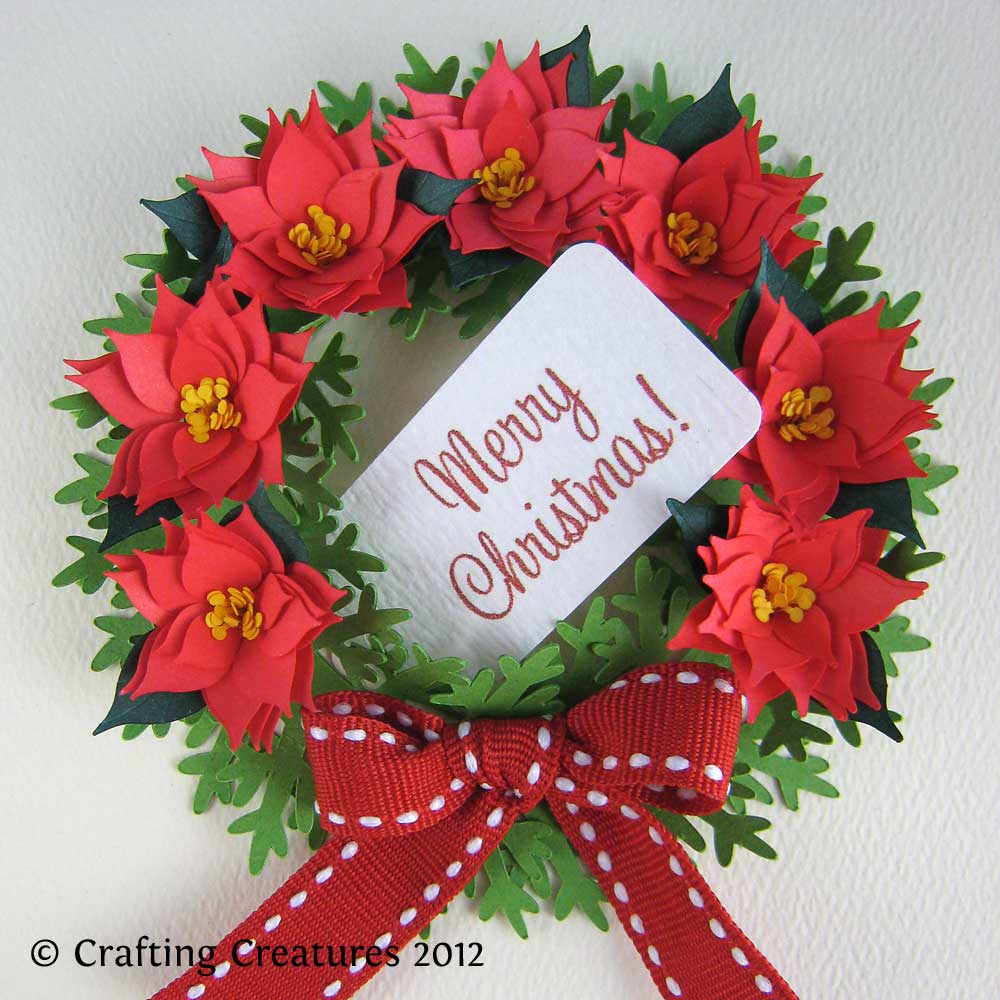
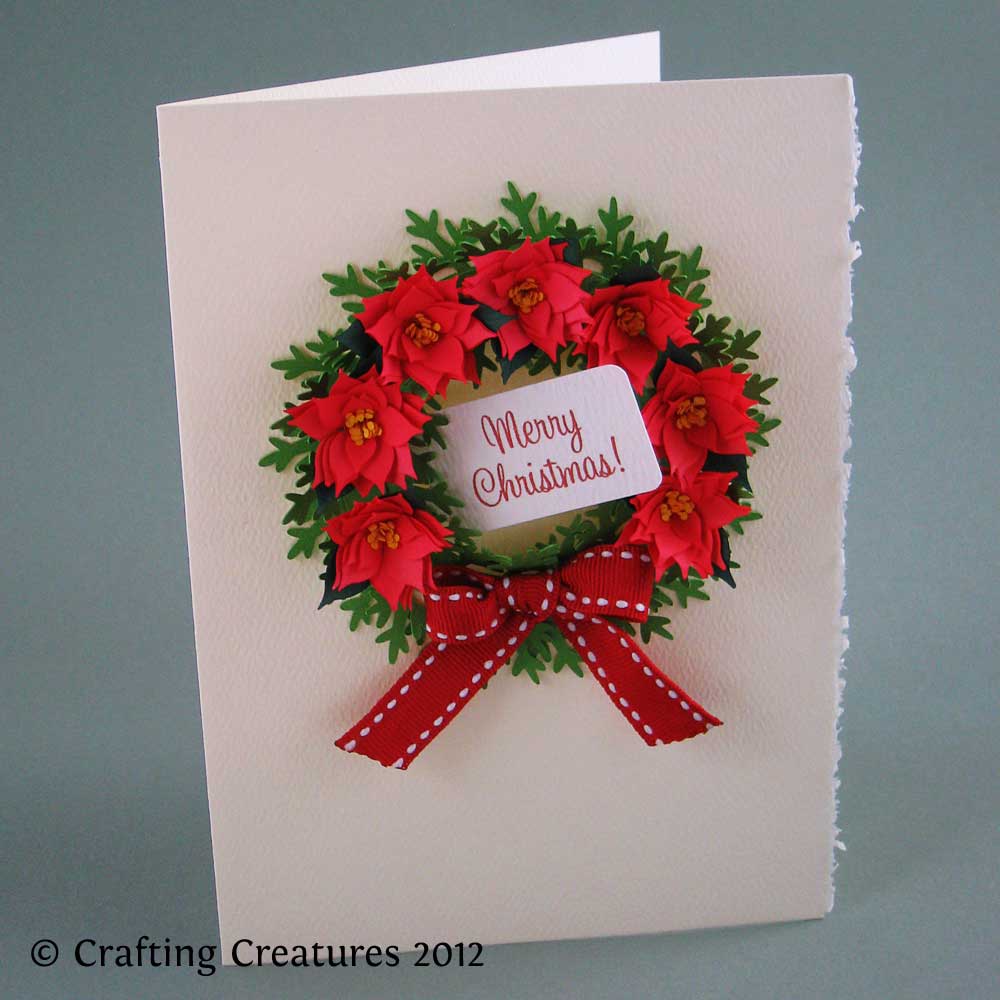
Paper Poinsettia and Wreath


Poinsettias simply say Christmas! The feedback I received for my fringed flowers was so overwhelming, I just had to make a Poinsettia version for Christmas cards.


These paper blossoms are designed as a fringed flower to be quilled into shape. The stamen, petals, and leaves are designed as one strip of paper to allow for quick rolling / quilling. Color markers were used on white 28 lb paper in these examples, however they can be cut from colored paper and the three parts glued into one strip.

The pine needle wreath is cut from two pieces of 80 lb paper and overlapped, then fluffed into shape to give the poinsettias a festive base. This example is a 5" x 7" card.


A regular envelope wouldn't do, so I made a windowed box to protect the blossoms.

Maybe I was a squirrel in a previous life, but as a little girl I loved boxes to hold things, keep secrets in them, and to give gifts in. This cube has a prepared hole for an enlarged version of the poinsettia. The cube is 2.5" x 2.5" x 2.5".


I don't bake a lot of cupcakes so this is about as close as I'd come to cupcake toppers. I have loved ones who are allergic to nuts and some who can't handle spicy foods. Instead of a quilling tool, I rolled the poinsettia in a toothpick, then glued in place. Added the warning flag at the bottom, and voila - food markers.


If you'd like to cut and quill paper poinsettias this Christmas, this Poinsettia Collection can be downloaded immediately via my store. I'd love to see what you make with my files, so drop me a line!

Wednesday, February 22, 2012

DIY Tracing Light Table


I needed to trace something and instead of taping it against the window, I realized our acrylic cook book stand was simply perfect. I lay it down on it's side and placed my lamp along the "bottom". Who can resist a 2 for 1 deal?


Thursday, February 2, 2012

Valentine Collection made by Brigit


I've had the pleasure of meeting Brigit on the Make-The-Cut Forum. She volunteered to test my "No Peeking! Boxes" during Christmas on her Zing and was kind enough to try out my Valentine collection as well.

Her thorough feedback was invaluable - especially as I learned that her Zing would cut notches where my lines didn't join - something that didn't show up on my Silhouette. Since scrapbooking is not my forté, I also loved seeing how she envisions my designs. It was her ink pad distressing that showed me how to give my 3D paper balls an extra pop, especially with the speeding arrows. To see more of Brigit's paper projects, visit her blog at: http://irishmist59.blogspot.com/

Thanks so much Brigit!!!

Cecelia

Friday, January 20, 2012

Heart Inspired Bunting


This is my first die cut paper banner / bunting / pennant design. A much anticipated little girl is expected this Valentine’s Day, and I wanted the shape of her shower’s banner to be reminiscent of a heart but not be quite that obvious. I also tried to keep some dynamic movement by having the overlapping shapes show thick and thin areas – not just a straight outline.

I’ve always felt ribbon is akin to a backup singer – to support the lead and not steal the show. To give all the emphasis on the lettering, I ensured the ribbon is easily threaded through loops on the back layer so one doesn’t see the supporting holes.

The three shapes (pink, green, white) are cut from 8.5″x11″ paper. The three layers are aligned using a jig so no eyeballing is needed. The lettering (not included) is Adobe Caslon at 410 pt. I can’t remember the brand name of ribbon, but it’s a sheer lime green and I got it from Michael’s.

Part 5 (and final installation) of my Valentine Collection on Etsy.


Saturday, January 14, 2012

3D Paper Ball with Hearts and Arrows

Beware of Cupid’s shooting arrows! It was a great discovery my first time to use an ink pad on the edges of my paper ball decorations to add dimension. I realized dragging the ink pad across the arrow would make it appear as if Cupid had just let it fly, especially when it caught on the edges.

Version 1 is easy to put together since it’s a single sheet of paper. Simply use beading wire, fishing line, or string to thread from the bottom hole, then thread each arc at the top. A rolled paper straw in the middle keeps the ball fully inflated. A scalloped circle finishes the top and bottom and the beads are optional. Version 2 allows you to combine two different papers, of course.

Part 4 of upcoming Valentine collection on Etsy.

Thursday, January 5, 2012

DIY Custom Chipboard Letters


I've heard of scrapbooks that rival the thickness of a New York hoagie. Perhaps it's because sandwiched in all the layers are dimensional chipboard letters lovingly decorated for each page; but what if you want your font, or your size, or your whatever?
 
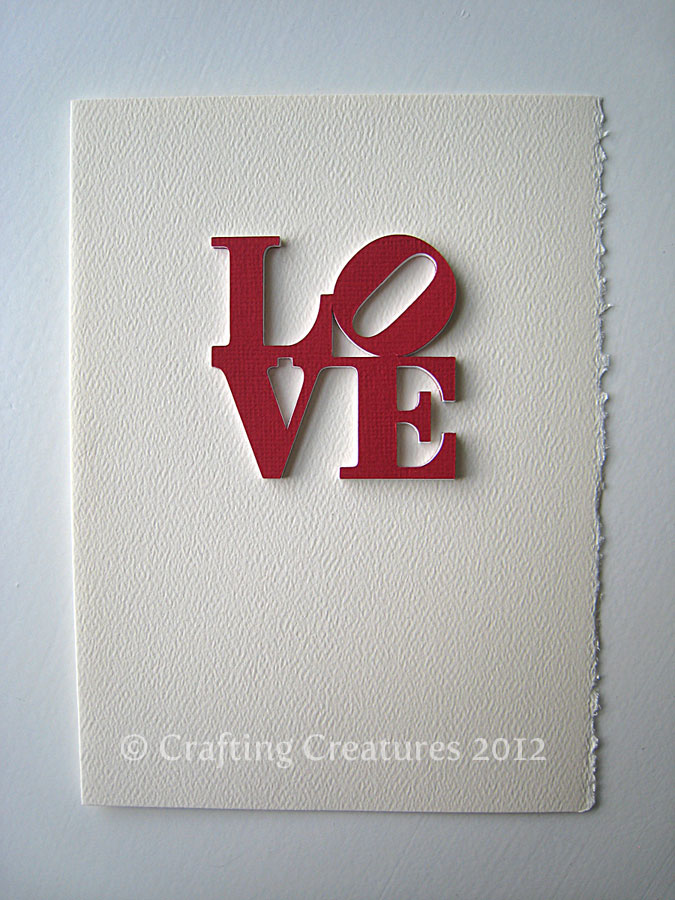
I made this chipboard version of the famous LOVE sculpture, designed by Robert Indiana. After cutting out the paper on my Silhouette, I glued 8 layers of 80lb cover weight card stock together (6 white pieces sandwiched in between 2 red ones). It makes an intriguingly subtle effect when glued on cream stock because the white seems to have life of its own. Pinning in strategic corners onto corrugated cardboard allows you to keep them in register as you race before the glue dries.


Sunday, October 30, 2011

My New Craft Room


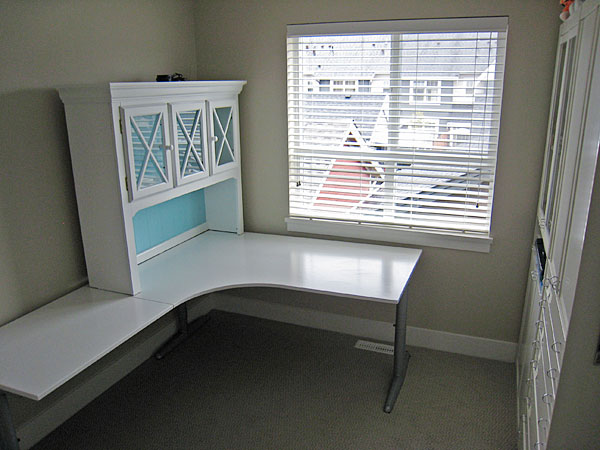
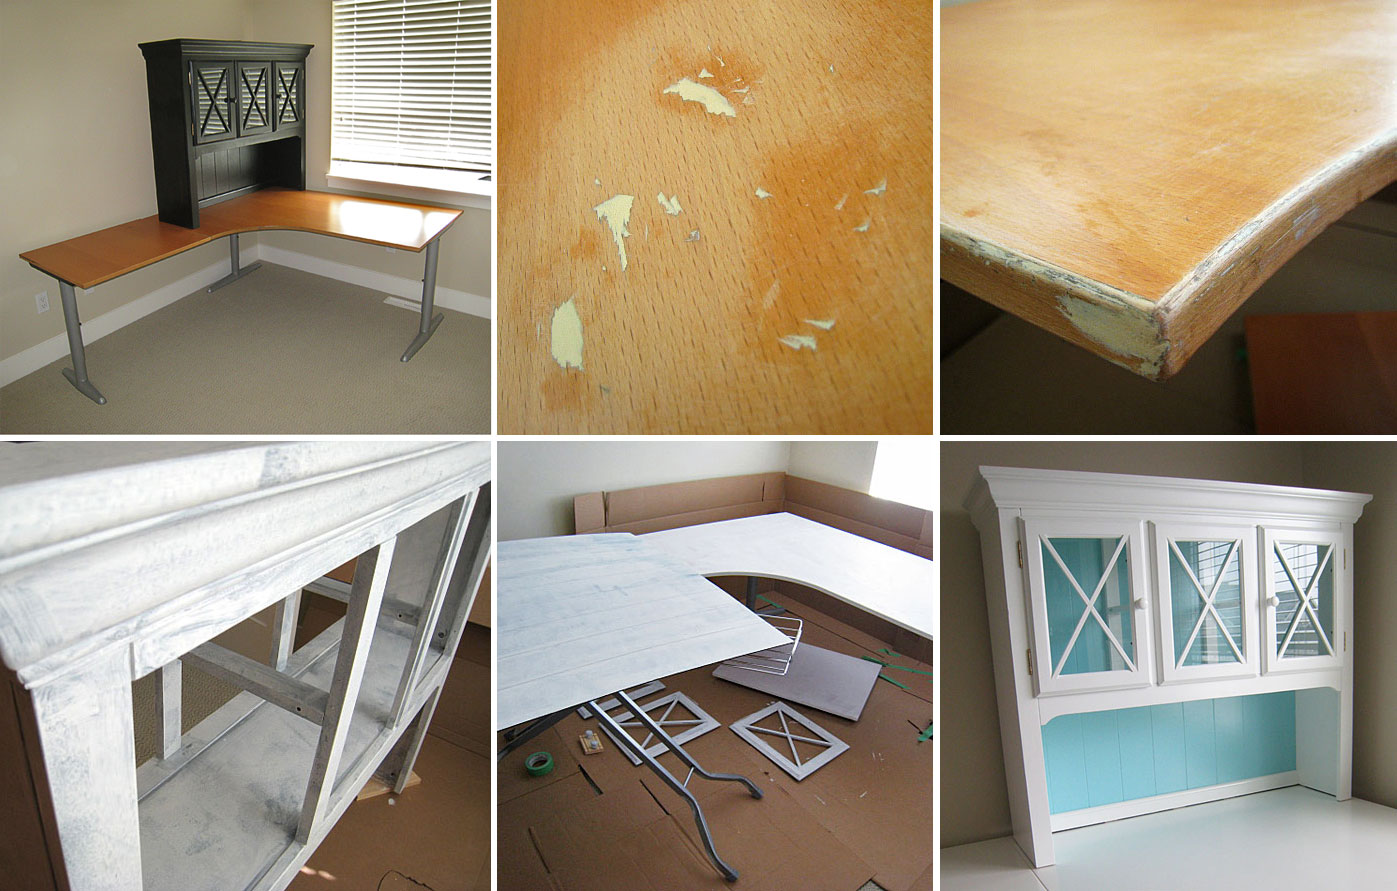
Here it is, all shiny and new - to me anyway. It's all messy with a laptop, die cutter, printer, and paper everywhere already, but at least I remembered to shoot it in it's pristine shape. Here are the nitty gritty photos so I can remind myself how much it took to get it here (and save poor hubby and me more work).


Amazingly, the never-unwrapped hutch was still available after a month sitting on Craigslist Free listings because it had no matching bottom. The L-shaped desk was quite pitted, but fixed easily with wood filler, then rough sanding prepared it for primer paint. An ironing board is great to hold furniture at eye level. Great thing about moving is all the extra cardboard lying around to be used as a drop cloth for paint. Oh Martha, your robin egg blue just screams "craft with me".


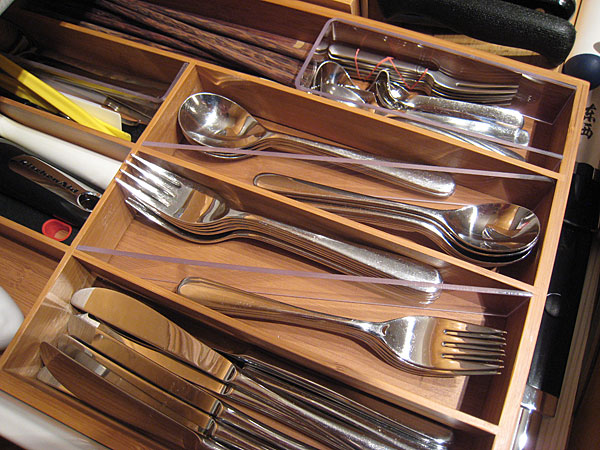
So what's up with the utensil tray? We were very lucky hubby's work had these offcuts of acrylic sheets at exactly the right height - kismet, I know! Our previous kitchen drawer allowed for a 2-tiered tray to divide the large and small spoons and forks, so we had to find a new solution for this tray. I love how the acrylic seamlessly divides and concisely uses space. The chopsticks and teaspoons are tamely corralled with a U-shaped bent piece. Yup, you guessed what I'll be using to divide all my supplies! More to come one day.

Monday, October 10, 2011

Tricked your Treat!


Who won the "What's inside the coffin contest?" No body. The answer is fish skeleton! Make no bones about it - I even put the answer in my Etsy listing! Please, no booing! Thank you all for playing! I had a screech :)

One more if you dare? Why couldn't Dracula's wife get to sleep?  Because of his coffin.

Monday, October 3, 2011

Crouching Spider, Hidden Candy


OK so it wasn't hard to guess what was coming, but I hope you've enjoyed the unveiling of my die cut Halloween coffin boxes. This one has a spider web made of black vinyl hidden on the inside of the coffin's lid. A small length of fishing wire is attached to the spider so kids will get an extra hidden surprise as they reach for the goodies inside. I have always loved shiny black on matte, a subtle and entrancing effect.


Here are some of my prototypes. Can anyone guess what's inside? I'll give you a hint - it's white and emaciated. Please be very specific - only FULLY correct guesses will qualify.

I will email a free SVG or DXF spider file to anyone who guesses correctly by next Monday, Oct 10, 2011.

Sunday, October 2, 2011

Knuckles


Pale knuckles grip the coffin's edge... 

my latest trailer for an upcoming die cut bundle for Etsy.

Saturday, October 1, 2011

Die cut spider


Scary movies know thrills are intensified by allowing your imagination go wild before they reveal the ending. Here's my teaser - stay tuned for more. Happy 1st of October!

Friday, March 25, 2011

Guest Post on The Creative Place


I was so inspired by Ashley's blog, The Creative Place, a treasure chest of DIY ideas. By coincidence I noticed her call for guest post submissions and decided to make and submit DIY instructions for my wedding party favor. My humble thanks, Ashley!

Monday, March 21, 2011

Silhouette Pen Comparison

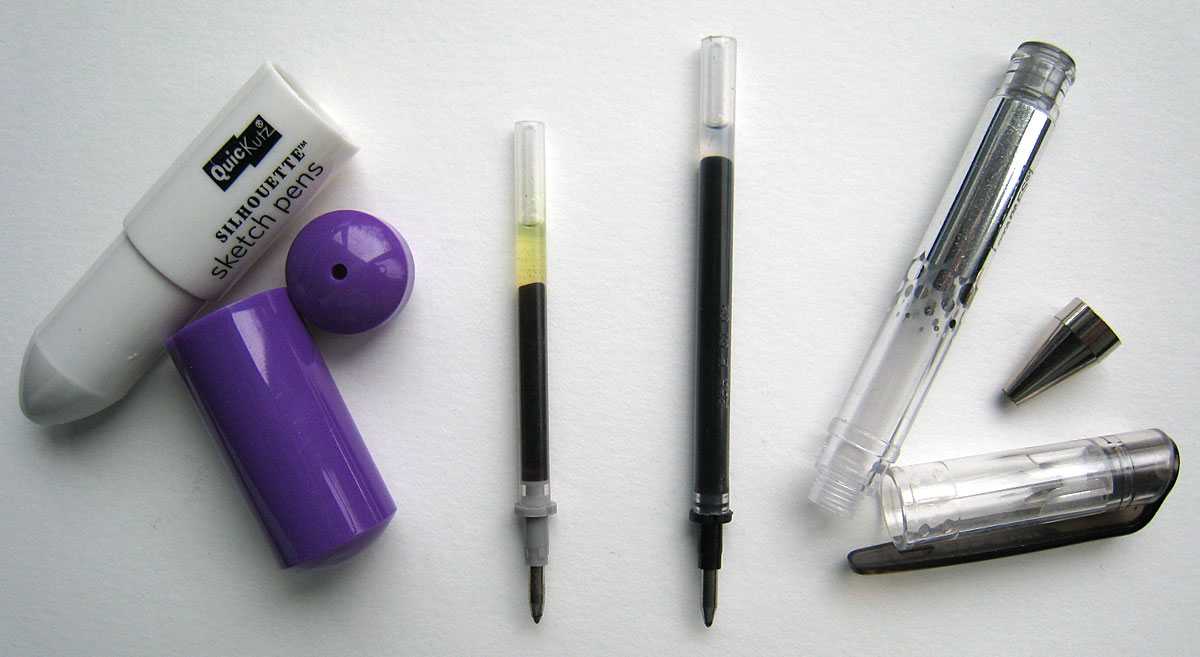
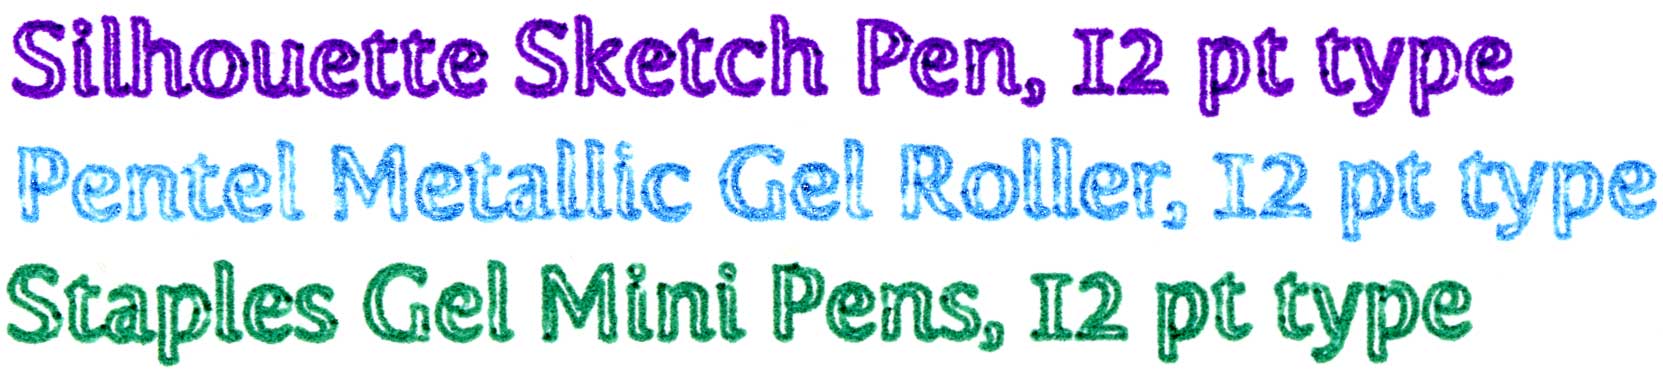
Found a pack of 12 Mini Gel Pens from Staples for $4 and hoped it would fit my pen holder from Silhouette. I was disappointed to see the pen won't go into the holder all the way. The Pentel Metallic Gel Roller fits though!


I took Staples and Silhouette pens apart and realized the Staples pen length was longer, but other than that it was about the same as Silhouette's pens. So I stuck the cap on top and taped the whole thing to prevent it from moving. After my Silhouette pens run out, perhaps I'll just cut down the Staples length and that will be my instant refill.

Here are the comparisons of all 3. Just click on the thumbnails to see a good enlargement of the details.

Tuesday, February 15, 2011

Transformer Birthday Card (Vinyl)

My most complicated die cut vinyl card to date – 5 colors and tiny details that added up to a card I hope my 11 yr old neffy-poo will remember. I got the vector file at Vector Junky but some of the details were so fine I had to open up the areas, as it kept getting caught in my blade.

Monday, January 31, 2011

Quilled E Monogram with Fringed Flowers


So I made a monogram for a friend who is turning 40 and requested a no gift policy – well, I'll still be able to say "I didn't buy anything." I wanted to show the flowers bursting forth in different stages of bloom. The "moat" which corrals the quilled flowers ends up hiding the quilled base from most angles; tilting the blossoms on their sides doesn't hurt either. I designed each flower pattern and cut them digitally on the Silhouette.


I’ve just discovered Moxie Fab World through a reader’s post of an intricately quilled heart, by Sweet Spot Cards. MFW have weekly challenges in their side bar, and I was pleased to find the right stuff in my stash for their “Pretty Pastels Color Challenge for Color Inspiration for Card Makers Week in the Moxie Fab World“, shown below: