Showing posts with label storage. Show all posts

Saturday, June 29, 2013

Kite Ribbon Storage Hanger (SVG, DXF, PDF, MTC files)


I don't have ribbon fever, but I do save the ones I'm given with gifts because they are still re-usable for other gifts or even my cards.


I used to save the scraps in small plastic bags to keep them from fighting, but when I'd discover it wasn't long enough, I'd have to re-ravel it – or if it was right, I'd have to deal with all the kinks.


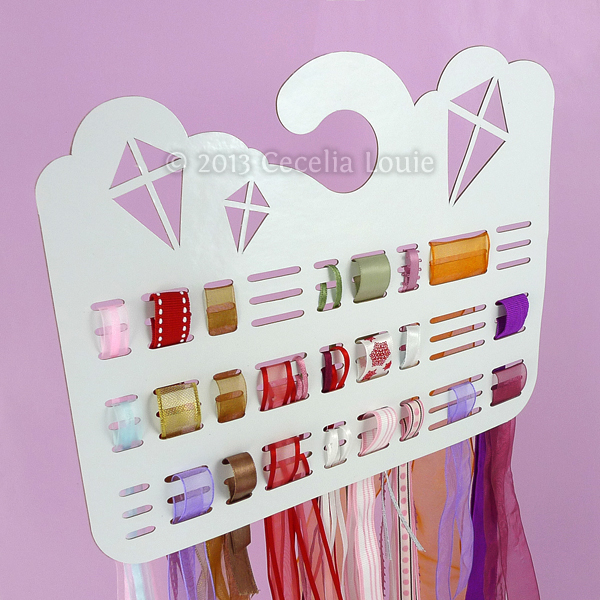
So I made my own with 4 layers of cardboard (the thickest my Silhouette can cut) and glued them together for strength and rigidity. You can also use poster board, chipboard, cardboard, even cereal boxes - whatever your machine or hand can cut. I added white vinyl to the two outer sides (before cutting) of my cardboard to give myself a neutral, white background, but I can imagine my kites and their ribboned tails against a light blue sky background too.


I love how the ribbons are stored with thicks and thins in orderly columns. Threading the ribbons through the 3 lines was quick to do, but also quick to remove too! They don't slide off (unlike my shirts on plastic hangers) and I can visually guage the length, color, width at a glance for my project. It now hangs in my craft room closet, kink-free!

I'm offering my Kite Ribbon Storage Hanger in the following formats: SVG, DXF, MTC, and PDF (for hand cutting if you prefer).

Wednesday, May 2, 2012

Quilling Paper Storage


I’m kinda late for an Earth Day posting, but better late than never.

I had a stack of plastic sleeves for negatives (remember those days?) that I couldn’t bear to toss in the landfill, so they took up space on my shelf for years. Now they are a valuable quilling strip organizer!

I used to have a box of half used strips that was more mangled than Medusa on a bad hair day. After detaching another new strip from the pack, I’d turn around and find I had a half used one I could have used up. Now I keep similar colors/weights on a page and they don’t argue with one another.

The block of pink you see on the far right (below) is a sheet I cut with my die cutter. I leave the ends intact so I snip off as I go. I find this method much easier than the lock of hair that has a life of its own.


Sunday, October 30, 2011

My New Craft Room


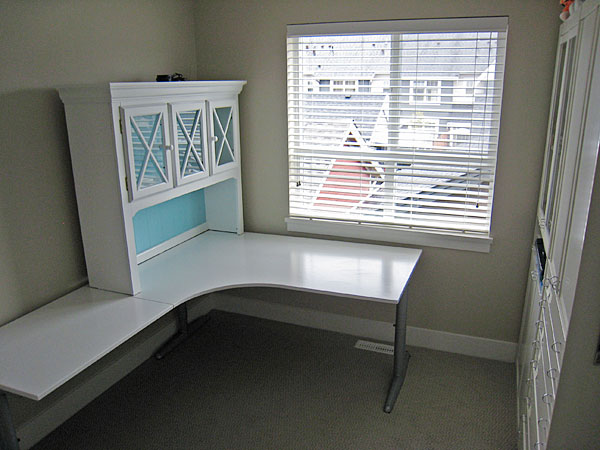
Here it is, all shiny and new - to me anyway. It's all messy with a laptop, die cutter, printer, and paper everywhere already, but at least I remembered to shoot it in it's pristine shape. Here are the nitty gritty photos so I can remind myself how much it took to get it here (and save poor hubby and me more work).


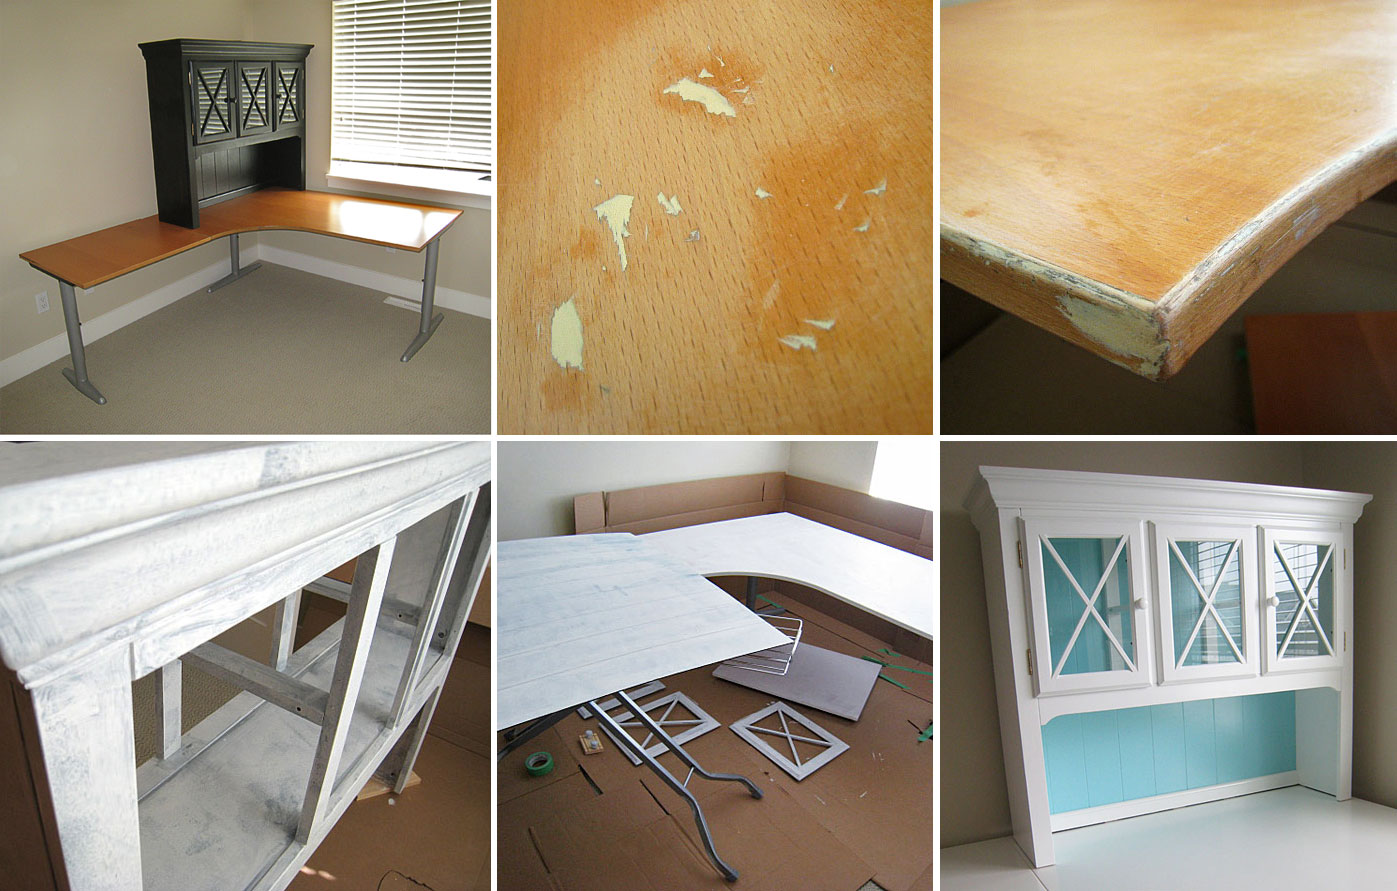
Amazingly, the never-unwrapped hutch was still available after a month sitting on Craigslist Free listings because it had no matching bottom. The L-shaped desk was quite pitted, but fixed easily with wood filler, then rough sanding prepared it for primer paint. An ironing board is great to hold furniture at eye level. Great thing about moving is all the extra cardboard lying around to be used as a drop cloth for paint. Oh Martha, your robin egg blue just screams "craft with me".


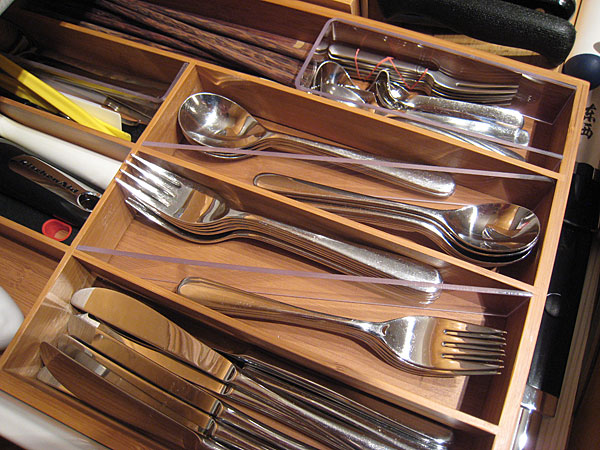
So what's up with the utensil tray? We were very lucky hubby's work had these offcuts of acrylic sheets at exactly the right height - kismet, I know! Our previous kitchen drawer allowed for a 2-tiered tray to divide the large and small spoons and forks, so we had to find a new solution for this tray. I love how the acrylic seamlessly divides and concisely uses space. The chopsticks and teaspoons are tamely corralled with a U-shaped bent piece. Yup, you guessed what I'll be using to divide all my supplies! More to come one day.

Thursday, August 11, 2011

Compact Craft Storage

We’ve finally moved and now I have my own craft room. This was my “before” storage for pencils, pens, felts, scissors, blades, erasers. I trimmed down a magazine file cardboard box from Ikea and cut salvaged foam core sheets (would have been trashed from a sign shop) for dividers. It all fit in the tall drawer of the Effectiv shelf from Ikea and I wish I had taken a photo of everything I managed to store in there before the move. Compact yet visible and quickly reachable.

For my various rolls of adhesive, I stacked the smaller rolls on a tiny tube and gave it a bottom – which all fit inside the large tube holding the larger rolls. Who doesn’t love a 2 for 1 deal?

Scored these 2 shelves off Craigslist (actual photo) for $50 each – can you imagine my drool over those drawers? When we got them home, I realized they belong in the Ikea Museum of Real Wood – what a find! During a recent garage sale hunt, I found a .25 cent miter box (helps you cut wood at true angles) which will help me make wooden dividers for each drawer so my pens and utensils can lie flat.
So although I enjoyed being creative in my small space, I am looking forward to having luxurious storage soon.