Showing posts with label paper. Show all posts

Wednesday, April 3, 2013

Folded Lucky Stars Tutorial


For years I used to carry a small tin case with travel scissors and paper. I would fold stars on the bus, waiting rooms, dark movie theaters, and while having conversations with people because folding was like breathing. To give a jar filled with 365 stars to someone showed you thought of them every day of the year. I’ve lost count after a thousand stars but always enjoyed seeing their expression. I’ve decorated greeting cards, the outside of jars, even Christmas trees with them – is it a wonder I used them in my wedding invitations?


There are many tutorials online for folding Lucky Stars but while teaching others how to make it, I’ve learned their number one mistake is creasing the first folds too much. By the time you reach the end and are ready to “puff”, the star is apt to squish to one side rather than separate into it’s 3D glory. Notice how it’s gently folded in place but not sharply creased? If you haven’t had success in the past, please try again with this small change and let me know if it made a difference for you.


I also like to fold around a string as I go, to make a bracelet or a garland of stars. The easiest material to use is ribbons because the width is ready to go and they’re oh-so-shiny.

To see my step-by-step tutorial, please visit my guest post on Ann Martin’s blog, All Things Paper.

If you haven't seen Ann's work before, prepare to lose a few hours exploring her site. Her wedding certificates are simply exquisite as they enhance the newlyweds' choice of theme. Any time a beginner quiller asks me for basic steps, I always point them to Ann's Basic Tutorials because she really pays attention to the nuances and helps people realize quilling is not as hard as it looks. Her  paper projects (check out her washi Easter egg tutorial) entice you to try different techniques and materials.

Ann also interviews paper artists around the world, showcasing their work and highlighting the subtleties. As if her plate isn't already full scouring the web and offering up the best eye candy, she has also authored a book of the same title, All Things Paper, which is like a hard copy of her popular site - but contains nothing you've seen yet. Not only does Ann have uber-human attention to detail, she also has a way with words, describing steps as if painting a picture - the best kind of tutorial maker out there. Thank you for being you, Ann.

Wednesday, March 13, 2013

Happy birthday 3D paper cake


Wishing our niece a happy birthday with a bubbly cake. She was into pink for years and now that she's on the brink of becoming a teenager, I thought I'd give one last shout-out to pinkness. Somehow the years of coloring with her made me really aware how well pink and purple go so well together.
The purple confetti and curls on top were made of quilling paper. The text is cut from vinyl. Everything else was cut with my Silhouette die cutter. I designed the 3D cake pattern months ago but got sidelined with a huge project, so I'm relieved to finally re-visit this in time to use it myself.

Wednesday, February 27, 2013

All Things Paper: 20 Unique Projects from Leading Paper Crafters, Artists, and Designers by Ann Martin


DON'T stop the presses! I can hardly wait to see this book in person (in another 3 months).

It's still being printed so I can't show you anything more, but when you see my project I hope you think the wait is worth the mystery. I'm honored to join some very prestigious paper-ists,  amassed by the well accomplished, all-seeing Ann Martin of All Things Paper.

So I can't tell you what I made, but no one said I can't say what it isn't. It isn't anything I've shown here before. Like I said - a "mystery"! Bah! It's no fun when no one else is in on the punny humor. Please bear with me - I'm excited by this milestone, my 2nd publication piece.

The book is available for pre-order on Amazon
http://www.amazon.com/All-Things-Paper-Projects-Designers/dp/080484366X

Monday, December 17, 2012

3D Ornament Gift Tag

I've seen many wonderful 3D ball ornaments and thought it might also make a great gift tag. It's also a great way to use up small scraps of left over paper.

It's super easy to make. Just fold your circle/ornament in half and glue about 5 various colors to each other, then to the tag. The best part is that it's easy to re-fluff back up if it's been squashed by another gift.

Have a happy crafting season everyone!


How to use up scrap paper

I have a big-ass folder of scraps because I can't bear to throw anything away that might someday be of use. I know this circle can be cut from this triangular corner, but how do I make sure I get it right the first (and only) time?

I lay down a used piece of paper (I salvage the papers from work that have been printed on too), then cut my shape. I cover the circle with my scrap and secure it with removable tape. Now when I cut again, I KNOW it will be 100% where I want. You can see I had just about 2mm margin of error.

Let me know if this method worked for you too!

Wednesday, November 21, 2012

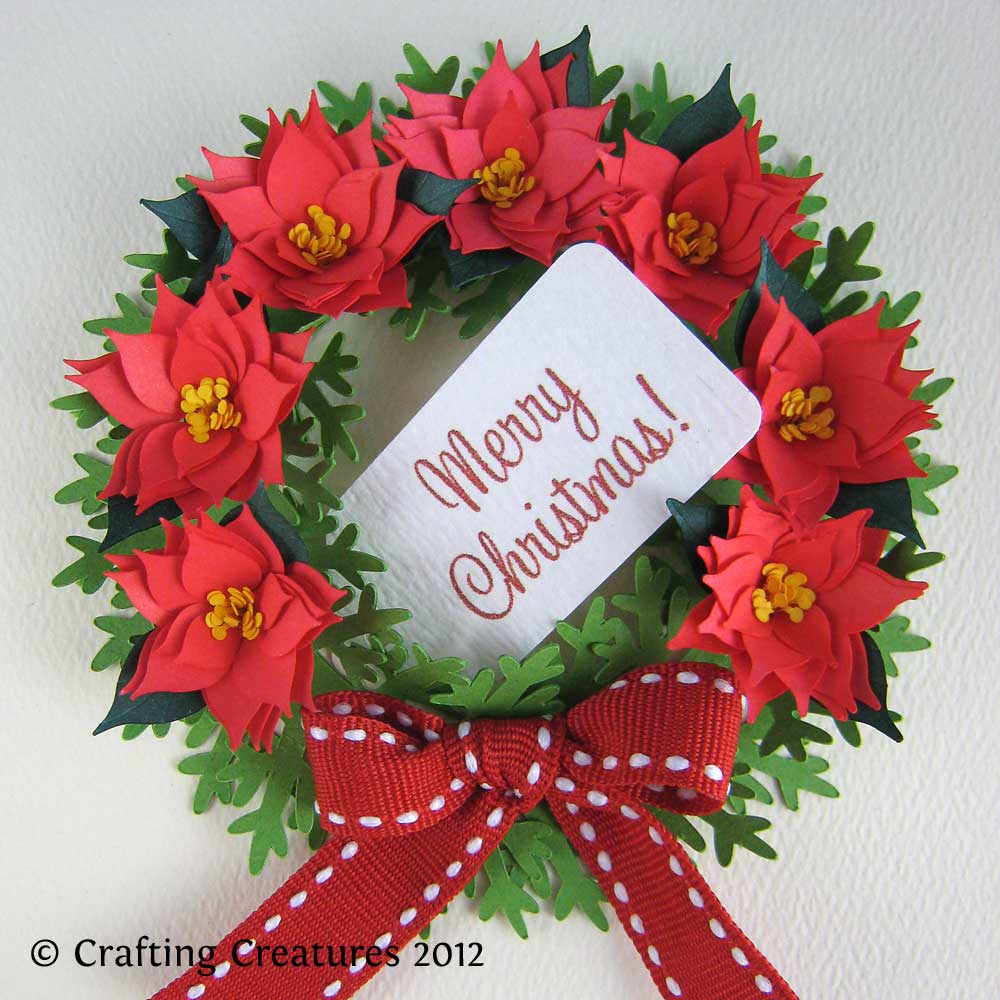
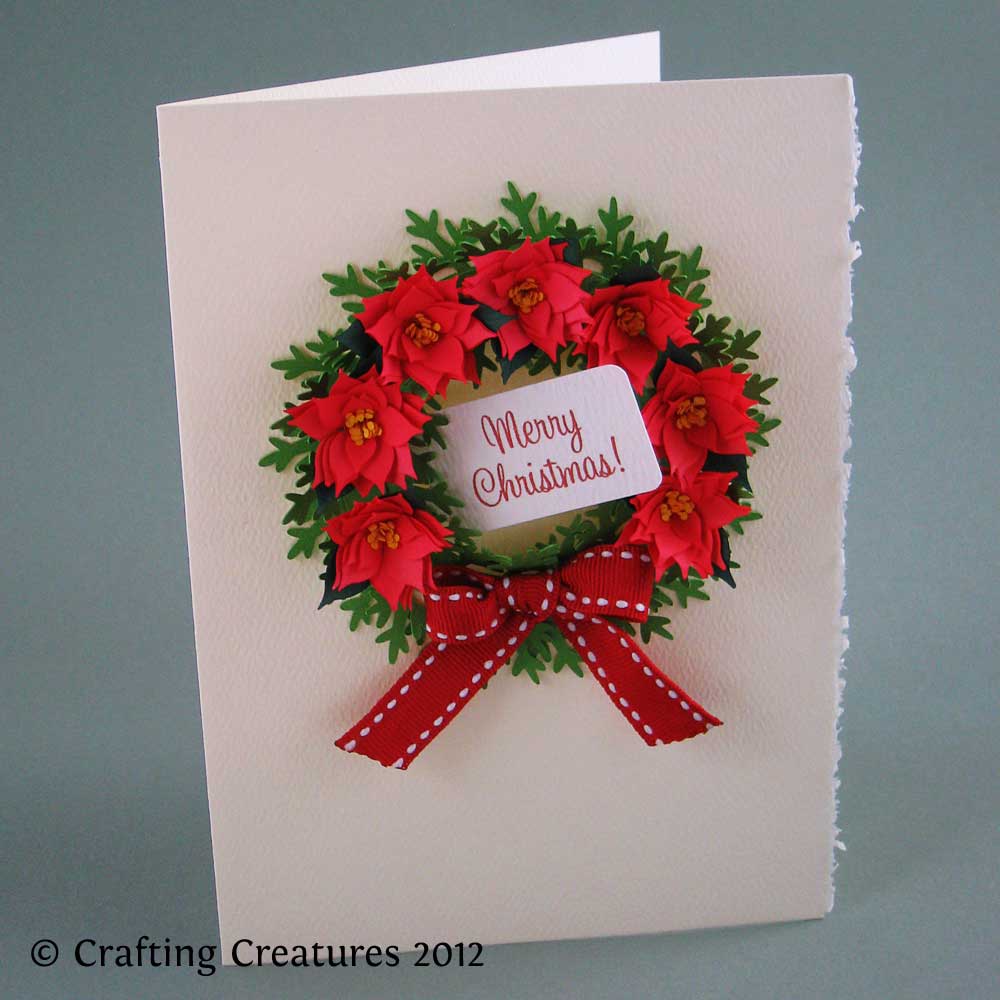
Paper Poinsettia and Wreath


Poinsettias simply say Christmas! The feedback I received for my fringed flowers was so overwhelming, I just had to make a Poinsettia version for Christmas cards.


These paper blossoms are designed as a fringed flower to be quilled into shape. The stamen, petals, and leaves are designed as one strip of paper to allow for quick rolling / quilling. Color markers were used on white 28 lb paper in these examples, however they can be cut from colored paper and the three parts glued into one strip.

The pine needle wreath is cut from two pieces of 80 lb paper and overlapped, then fluffed into shape to give the poinsettias a festive base. This example is a 5" x 7" card.


A regular envelope wouldn't do, so I made a windowed box to protect the blossoms.

Maybe I was a squirrel in a previous life, but as a little girl I loved boxes to hold things, keep secrets in them, and to give gifts in. This cube has a prepared hole for an enlarged version of the poinsettia. The cube is 2.5" x 2.5" x 2.5".


I don't bake a lot of cupcakes so this is about as close as I'd come to cupcake toppers. I have loved ones who are allergic to nuts and some who can't handle spicy foods. Instead of a quilling tool, I rolled the poinsettia in a toothpick, then glued in place. Added the warning flag at the bottom, and voila - food markers.


If you'd like to cut and quill paper poinsettias this Christmas, this Poinsettia Collection can be downloaded immediately via my store. I'd love to see what you make with my files, so drop me a line!

Wednesday, April 25, 2012

Fringed Flowers for Quilling


Last year I created a letter E monogram for a dear friend. After all the positive feedback, I'm pleased to offer it on Etsy. This is a combination of my top two paper passions - quilling and die cutting, my worlds colliding.

The flowers blossom at varying stages just by the way you curve the paper petals. The colors shown here are done by hand using alcohol-based markers. The stamen, petals, and leaves are designed as one strip to allow for quick rolling / quilling.


Fringed quilling strips have traditionally been limited to 90˚ or 45˚ cuts, but with a digital die cutter, the sky is the limit. This collection of 4 flowers with rounded petals are combined with a scalloped edge heart tray to hold your bouquet. They are ideal for card making, gift wrapping, or decorating custom monograms or letters.

Sunday, December 11, 2011

Xmas Dinner Setting

I've admired wine charms but can't remember what color I am halfway thru the night. So I've made my own and left space for names. Matching gift tags? But of course!

 Enlarge by 150% and they're suitable for mugs too.


For placecards, I've made pop up scenes of favorite winter wonderland moments. I've just listed on Etsy now - a little late for the season but better than waiting till next year!

Monday, October 10, 2011

Tricked your Treat!


Who won the "What's inside the coffin contest?" No body. The answer is fish skeleton! Make no bones about it - I even put the answer in my Etsy listing! Please, no booing! Thank you all for playing! I had a screech :)

One more if you dare? Why couldn't Dracula's wife get to sleep?  Because of his coffin.

Monday, October 3, 2011

Crouching Spider, Hidden Candy


OK so it wasn't hard to guess what was coming, but I hope you've enjoyed the unveiling of my die cut Halloween coffin boxes. This one has a spider web made of black vinyl hidden on the inside of the coffin's lid. A small length of fishing wire is attached to the spider so kids will get an extra hidden surprise as they reach for the goodies inside. I have always loved shiny black on matte, a subtle and entrancing effect.


Here are some of my prototypes. Can anyone guess what's inside? I'll give you a hint - it's white and emaciated. Please be very specific - only FULLY correct guesses will qualify.

I will email a free SVG or DXF spider file to anyone who guesses correctly by next Monday, Oct 10, 2011.

Sunday, October 2, 2011

Knuckles


Pale knuckles grip the coffin's edge... 

my latest trailer for an upcoming die cut bundle for Etsy.

Tuesday, January 11, 2011

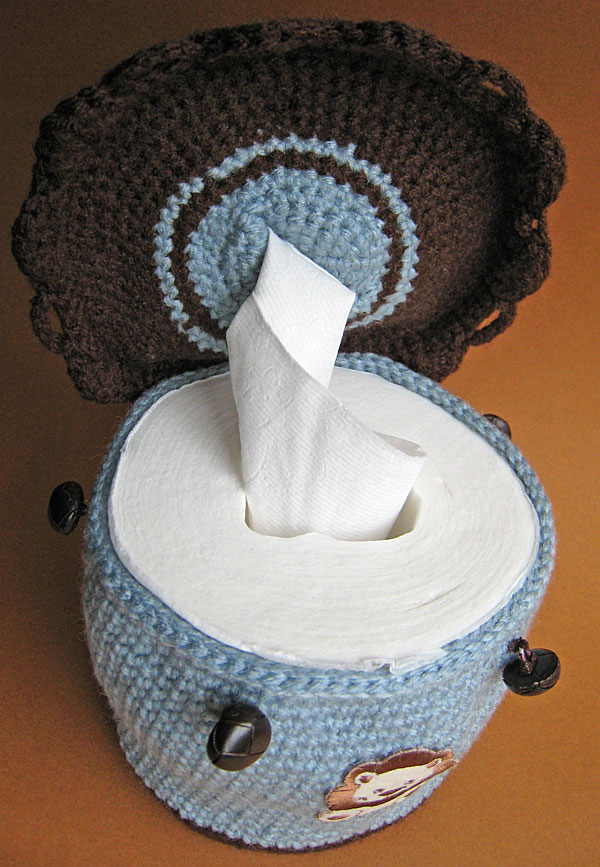
Crochet Toilet Paper Holder

Our nephew has entered the teething stage and his chin constantly needs wiping. A common practice in Hong Kong is to remove the inner cardboard tube from a roll of toilet paper, freeing a stream of squares, perfect for wiping off small dribbles. One can encase in a zip lock bag, or have a doting auntie whip up a crocheted case specifically for that purpose.
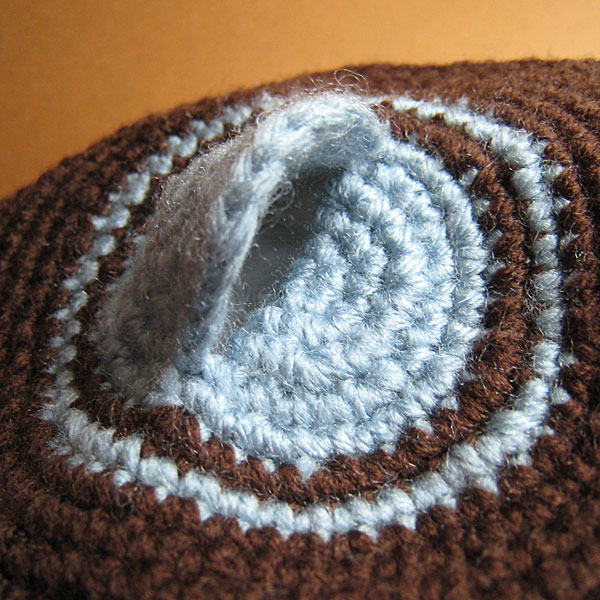
The hinged top is brimmed with a scallop edge, which allowed for loops to be buttoned down. The “spout” is made from a circle folded in half (to add some rigidity), then covered by yet another circle on top. The lion is an iron on applique from the sewing section at Jo-Ann’s.